
What can you do if you’ve got a gorgeous Buddleia growing in your yard, but you want to turn it into three or four? There are a few workable ways to propagate a Butterfly Bush, but the most common is to raise it from a cutting. It’s a good way to recreate the exact traits you love about your current plant, not to mention being fairly fast. This post will give you all the knowledge you need to reproduce your Butterfly Bush from a cutting.
To propagate a Butterfly Bush from a cutting, slice off a three to six inch section of new growth in the early summer. Trim the lower leaves and place the stem in a fast-draining potting mix. Keep the soil moist and provide lots of indirect light. Within a few weeks, your cutting should be rooted and ready to transplant.
Hardwood cuttings from a Butterfly Bush may also take root and grow, but it’s less likely. Using rooting hormones and humidity-boosting techniques may improve your odds of success no matter what type of cutting you take. We’ll give you a detailed look at these methods in our step-by-step guide to Butterfly Bush propagation.
Why Would You Propagate a Butterfly Bush From Cuttings?
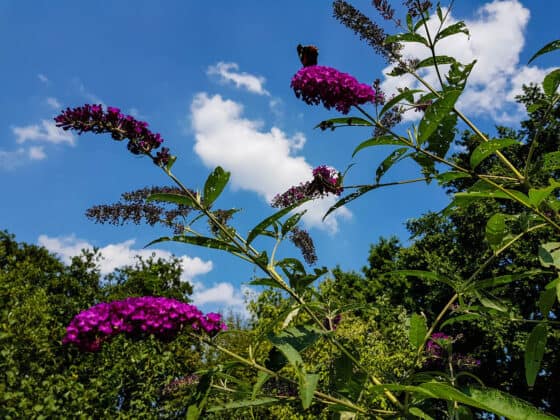
Buddleia Davidii, the common Butterfly Bush, is considered invasive in many places due to its abundant seed production. So if this plant reproduces so readily from seed, why bother using cuttings to propagate it?
There are several reasons home gardeners might prefer propagation via cuttings. Here are the main ones:
It’s a Faster Way to Propagate
You can take a cutting from your Butterfly Bush in the early summer and have it growing happily in its own pot by fall. When spring rolls around, you can plant it in the ground. By the end of that growing season, you can have a decent-sized, blooming Buddleia.
Seed propagation is slower and takes more work to get right. You won’t be able to harvest the seeds until autumn, so you’re already starting later than you would with a cutting. Then you’ll have to chill them for a month or so to encourage germination, sow them in a planter, and wait another few weeks for them to sprout. It will probably take another year before they’re big enough to bloom.
In the time it takes to turn Buddleia seeds into six inch seedlings, you could have turned a few cuttings into mid-sized, flowering plants. Of course, you may not be able to get the same numbers of offspring as you would from seeds. But how many of us really need 50 or 60 new Butterfly Bushes?
A Butterfly Bush Cutting Will Look Just Like the Parent
The magic of growing plants from seed is that you never know exactly what you’re going to get. That’s the reason why nature produces so many flowers and fruits. Sexual reproduction lets plants shuffle their genes around to speed up evolution. That’s why plants grown from seed may have striking differences from their parents.
But unpredictability isn’t necessarily what you want in your garden. If you’re happy with the way your Butterfly Bush looks and you just want to make more, propagation by cuttings is the way to go. The new plant will be genetically identical to the old one — technically, this is a form of cloning! In general, a Butterfly Bush cutting will grow and flower just like the shrub you took it from.
Not All Butterfly Bush Cultivars Have Seeds
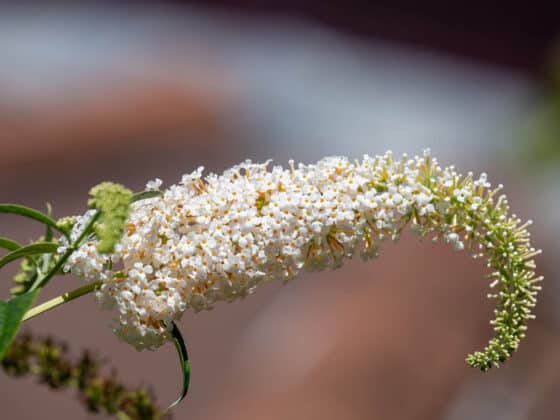
To avoid invasiveness, some plant nurseries have bred seedless (or near-seedless) varieties of Butterfly Bush. In some states, these are the only kinds that growers can legally sell. Since reproducing these variants from seed isn’t an option, some gardeners opt to propagate them from cuttings.
This is technically illegal in many cases because sterile Butterfly Bush cultivars are usually patented. Of course, plant patents are really intended to stop people from propagating and selling these plants on a commercial scale. It’s unlikely that a home gardener who planted a few cuttings in their yard would be prosecuted. But we can’t advise you to break the law, so consider this your warning.
What You’ll Need to Propagate a Butterfly Bush From Cuttings
Multiplying plant cuttings is among the most low-tech forms of cloning, but it still does require a few supplies. You’ll want to put together the following materials before you get started:
- Pruning tools. A handheld set of bypass pruners should be all you need for this job.
- Disinfectant. Getting germs in your plant’s wound is bad, so have some rubbing alcohol or diluted bleach on hand.
- A clean rag. For wiping down your blades.
- Potting mix. The growing medium for rooting a Butterfly Bush cutting should be well-aerated and fast-draining. You can usually get good results from a mix of 50% pumice or perlite and 50% peat moss.
- Pots. You can keep all your cuttings in one mid-sized pot while they’re growing roots, then move them into individual containers. It’s best if all these pots have drainage holes. Four to six inch plastic nursery pots are probably big enough when it’s time for the cuttings to start growing solo.
- A clear plastic bag. You’ll use this to cover the cuttings while they’re rooting. Grab a stick or stake to hold it up, too. You could also slice off the base of a large plastic bottle that will fit over the pot.
- Rooting hormone. This is optional, but it should increase the chances that your cuttings will grow strong roots. Use a formula with relatively low strength, like this one.
How to Propagate a Butterfly Bush From a Cutting
Once your tools and materials are ready, here’s how you can start multiplying your Buddleia.
Step 1: Take Your Cuttings
It’s easiest to propagate a Butterfly Bush from cuttings of softwood — new growth that hasn’t yet hardened off. That means that the ideal time is usually in the late spring or early summer. You can wait until later in the growing season, but that reduces the amount of time your cuttings have to grow. And the more woody and rigid the branches get, the less likely they are to take root successfully.
Take your cuttings from the ends of your Buddleia’s branches — ideally, those that aren’t yet blooming. You should slice off segments that are at least three to six inches long, with at least a few sets of leaves. Swab down your blades with your sanitizing agents before each cut, and snip your plant at a 45-degree angle.
You’ll probably want to take at least a few cuttings. It’s hard to guarantee that they’ll all survive this process, so having several backups is a good idea. The spots where you cut will likely flower a little later than the rest of your plant, so take them from different spots around your Butterfly Bush. Otherwise, you might wind up with a large bare patch.
Step 2: Clip Off the Lower Leaves
Disinfect your pruners again and slice the leaves along the lower third of each cutting. (“Lower” in this case means closer to the original cut.) Snip just past where the leaves branch from the stem, freeing up the growth nodes to produce roots instead of new leaves. You want at least a couple of bare nodes on each cutting.
Keep a few leaves at the upper end of the cutting to provide food for the plant as it grows. Pinching or snipping off the very tip can be a good idea, though, especially if you want a full and bushy plant. Always remove any visible flower buds — you want to encourage root and foliage growth rather than blooming.
Step 3: Plant Your Cuttings
Moisten the potting mix lightly. Don’t get it dripping wet, but do get it damp enough that it sticks together when you roll it between your fingers. Fill up the pot where you’ll be rooting your cuttings.
If you’re using rooting hormone, now’s the time to apply it. Dip each cutting into the rooting hormone powder so that it gets on the nodes. You only need a light dusting to get the effects. It’s best to shake off any excess because too much hormone powder can actually suppress root growth.
Now plant your cuttings in the pot. This may be easier if you poke holes first with your finger, a pencil, a chopstick, or something similar. Slide each cutting into place, making sure several leafless nodes are under the surface. Then fill in with a little extra potting mix, if necessary, to keep them standing upright.
Step 4: Get Your Cuttings Under Wraps
Plant your stick or stake roughly in the center of the pot and drape the plastic bag over it so that it’s entirely covering the pot. This creates a temporary greenhouse or terrarium, trapping humidity inside so things remain moist. Humid conditions are favorable for root growth. They’ll also cut down on the need to water your cuttings, thus reducing the risk of overwatering.
Find a place to keep your cuttings where they’ll be sheltered from the wind and receive lots of indirect light. That could mean a shady spot outdoors or a sunny place indoors (east-facing exposures are best). The best choice probably depends on what the prevailing weather is like. Your cuttings will do best if they remain around 70 degrees Fahrenheit.
While you’re waiting for your cuttings to take root, keep an eye on the bag. When you no longer see condensation forming on the insides, it’s time to water your cuttings again. Don’t provide any fertilizer at this stage, and don’t let them sit in direct afternoon sunlight. Otherwise, they could get scorched and dehydrated.
Step 5: Transplant Your Butterfly Bush Cuttings
When you propagate a Butterfly Bush from cuttings, it usually takes the clones three to four weeks to grow healthy roots. If you think they’re getting close, you can give one of them a slight tug to check. Resistance means the cutting has taken root.
At that point, you can move them into individual pots. Some guides say you can plant the cuttings right in the garden at this point, but you’ll be taking a bit of a gamble if you do. This may work better if you have a long growing season, and you can expect them to have more time to get established in the ground before frost sets in. Otherwise, it’s probably best to raise them indoors until next spring.
Fill your small pots with about ⅓ full of damp potting mix. You could probably use the same blend described above, but it may be better to amend it slightly to make it more moisture-retentive and nutritious. Try mixing 40% perlite, 40% peat moss, 10% shredded bark, and 10% worm castings.
Gently uproot and transfer your cuttings to their new pots. The best way to do this is to dig your fingers into the soil around each plant to create a little scoop of earth containing the roots. Set them in their new pots, sprinkle more potting mix in to steady them, and give them a little water.
Now choose a warm, well-lit spot in your home to let your plants grow over the winter. Keep them under grow lights if you want them to get as big as possible before going into the ground. You don’t need to place them under plastic bags anymore. Instead, just test the soil every few days and water thoroughly when the topmost inch feels dry.
Step 6: Plant Your Butterfly Bush Clones Outdoors
Shelter your baby Buddleias inside during the winter. When the weather starts warming up again next year, start getting them accustomed to the outdoors. For an hour or two each day, take the clones out and let them sit in the sun. Little by little, you can increase this exposure. Once they’re getting six or more hours of daylight, they’re ready to make the jump to your garden. (Unless you’re planning to keep them in pots permanently.)
Choose a spot where your Butterfly Bushes will get at least six to eight hours of direct sunlight per day. They prefer well-drained soil, but they can grow in a wide range of conditions if they have to. Make sure you know how much space your Butterfly Bush needs. They may be small cuttings now, but some varieties can quickly grow more than ten feet tall and eight feet around!
For each cutting, dig a hole that’s about as deep as the pot and two to three times as wide. Slide the plant free, squeezing the sides of the pot if necessary to loosen it up. Then place it in the earth and fill the hole back in with dirt, making sure that the top of the root mass is level with the ground — or an inch or two higher if the soil has slow drainage. Take a look at this article for more detailed instructions on planting.
After you’ve planted your clones, you can treat them pretty much like any other Butterfly Bush. The only difference is that they’ll probably need a bit more water during their first year in the ground. Monitor the soil with a moisture probe and hydrate thoroughly if the upper two inches dry out.
Can You Root a Butterfly Bush Cutting in Water?
Some people like to root their cuttings in water rather than soil, and it’s a workable way to propagate a Butterfly Bush. Simply place your cuttings in a small jar of water instead of in a pot. Make sure that a few nodes are covered by the water.
You don’t need to worry about keeping your cuttings under a humidity tent like you would in a pot. Just keep them warm, provide them with indirect light, and change the water once a week. Eventually, they should start to grow slender, greenish water roots. Once those roots are an inch or two long, you can transplant your cuttings into pots.
Though this method is workable, it’s not our preferred option. For one thing, water rooting tends to be slower. For another, cuttings rooted in water often have a hard time adjusting to the soil, and you’ll likely lose some of your clones due to the shock. In our view, the little bit of added convenience doesn’t make up for these downsides. Your experience may be different, though!
Propagating a Butterfly Bush Through Layering
You can also propagate a Butterfly Bush by tricking the stems into growing roots before you even cut them off. You can often get bigger, more vigorous clones this way, and you don’t need to tend them indoors while they’re rooting. There are two slightly different methods: simple layering and air layering.
Simple Layering
Simple layering can be done once the branches are long enough to touch the ground with a few extra inches. To layer a branch, bend it down to see where it will meet the soil. Cut a slit in the stem at that point, dusting it with hormone powder if you like.
Then bury that section of the branch just under the soil surface, water it, and cover it with some mulch. Weight the branch down with a rock, or use a couple of garden staples to secure it in place.
It will likely grow decent-sized roots within a few weeks, at which point you can cut it free from the main branch and transplant it. Many people prefer to wait until the following growing season, though. That should ensure that it’s got a thriving root system and is ready to be moved to its permanent home in your garden.
Air Layering
Air layering a Butterfly Bush is slightly more complicated, but it’s also less likely to result in infection. Instead of placing the cut in contact with the soil, you surround it with a sterile rooting medium like sphagnum moss.
To air layer a branch, make a slit and dust it with hormone as described above. But rather than bending it down to the ground, pack some moist sphagnum moss around the cut. Then seal it with plastic wrap and tape. Or you could cover it with a plastic bottle that you’ve cut up the side so it can get around the stem.
Moisten the sphagnum moss whenever it starts to dry out. Little by little, the roots will grow into the moss until you’re ready to cut the end of the branch off and plant it.
Note that air layering may work best with older, woodier branches. Young and flexible ones might simply droop to the ground under the added weight.
Final Thoughts
It’s fairly easy to propagate a Butterfly Bush from cuttings as long as you treat them right when they’re rooting. These vigorous plants grow back rapidly, even from fairly small segments of stems. Hopefully, you’ll soon have a garden filled with the lovely sights and scents of the Buddleias you love!