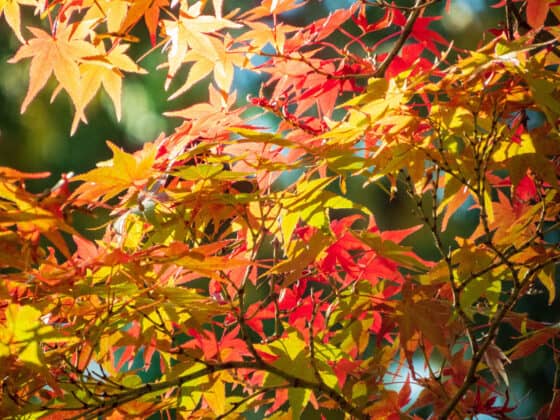

Looking at your Acer Palmatum dropping its little whirling seeds all over your yard, you might wonder if you can do anything with them besides raking them up and tossing them out. The answer is yes — you can grow Japanese Maples from seed! This process isn’t as fast or reliable as grafting, air layering, or taking softwood cuttings. However, it’s quite simple and can be a fun project if you’re willing to be patient.
To grow Japanese Maples from seed, collect the pods in mid-Autumn, soak them overnight, and place them in a fluffy, high-drainage soil mix. Keep them cold over the winter, then let them germinate in spring. The exact appearance of your new trees will be a surprise, so don’t try to reproduce named cultivars this way.
Raising your Japanese Maples from the seedling stage into full-grown trees will take time and care. You may have to pamper the seedlings with shade and water until they’re strong enough to survive on their own. Even then, you’re likely to lose some of your initial crop. But with patient, diligent care, you should be able to raise quite a few healthy Japanese Maples from seed.
Why Gardeners Grow Japanese Maples From Seed
Raising new Japanese Maples from seed is a lengthy process that can go wrong at several different stages. And unlike propagating from cuttings, it won’t reliably produce a tree with the same characteristics as the parent. So why go to the trouble? There are a few possible reasons.
Value and Volume
In a fruitful year, Japanese Maples can drop hundreds of seeds. Gathering them and growing them poses no risk to the tree’s health. In contrast, you can only cut so many branches of your Japanese Maple without at least slowing its growth. If you want lots of new trees at once, seed propagation is an easier route.
Plus, seed propagation is by far the least expensive way to get a new Japanese Maple. If you don’t own one of these trees, but there’s one in your neighborhood, why not collect a few of the seeds it drops? The plants that grow won’t look exactly the same, but they should still be beautiful.
Genetic Diversity
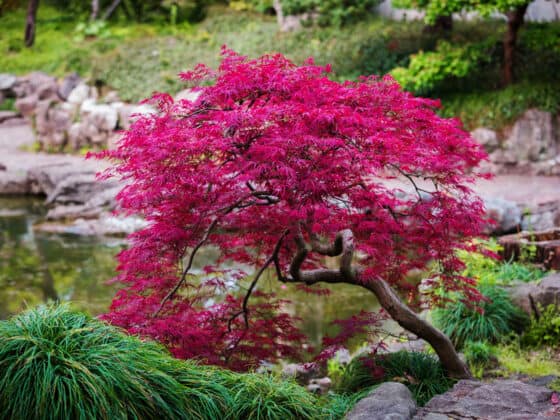
Japanese Maples combine their genes in unpredictable and varied ways when they reproduce through seed. The resulting trees can be very different from their parents, sometimes with dramatically different leaf shapes, colors, and growth patterns.
That’s not so great when you’re trying to reproduce a particular named variety for sale, but it does offer the opportunity to find new and unexpected beauty. Every so often, a Japanese Maple seedling may surprise you with a gorgeous new look. If you’re extra-lucky, you might stumble on a never-before-seen cultivar that collectors will swoon over.
Producing Rootstock for Grafting
Most Japanese Maples grown for commercial sale are produced by grafting, a process in which a cutting from one tree is fused to the roots of another. The Japanese Maple varieties with the prettiest foliage don’t always grow the most vigorous roots. Grafting lets you get around this problem — the upper part of the tree will look like the scion, while the roots can come from a more robust variety.
Growing trees from seed is a good way to get rootstock. Most of the resulting plants will be similar to wild Japanese Maples. They should have strong roots well-suited to thriving in variable conditions.
Experimenting and Having Fun With Japanese Maples
Growing trees from seed can also be interesting and satisfying for its own sake. The process lets you observe and participate in the entire life cycle of your Japanese Maple. It will take years to produce a full-sized tree this way, but watching it slowly grow from a seed the size of your fingernail has a certain magic of its own.
How Do Japanese Maples Produce Seeds?
Japanese Maples are pollinated naturally by bees, hoverflies, and other insects. With good growing conditions, they’ll generate huge numbers of fertile seeds. You shouldn’t have to do anything special to get them to set seeds. Just care for them as you normally would and let nature take its course.
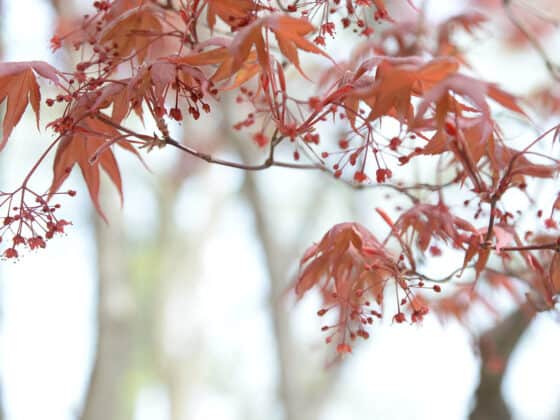
The process of seed production begins in the late spring, when small red, pink, or purple blooms appear on your Japanese Maple’s branches. They dangle down like bells or berries, with clusters of about a dozen flowers on each stalk. Japanese Maple flowers don’t get as much attention as their foliage, since they’re not especially showy or fragrant. However, they do have a certain charming beauty, particularly next to leaves with green or gray coloration.
In the late spring and early summer, the fertilized flowers will begin swelling up into seeds. Like most Maples, your Acer Palmatum and its relatives produce a type of seedpod called a samara. It’s marked by thin, papery “wings” that flutter and spin as they fall, helping the seeds travel further before settling to the ground.
Samaras can come in various shapes and sizes, but on Japanese Maples, they have two wings and two seeds each. They typically sport the same reddish colors as the flowers during the growing season, though they may also have bright green highlights.
How to Grow Japanese Maples From Seed
Gathering and sprouting Japanese Maples from seed can be a lengthy process, but you can break it down into a few simple steps.
Step 1: Harvest Your Seeds
The only real trick to this step is timing — you’ll need to let the samaras ripen first. They’re ready for collection when they’ve turned brown and dry and drop easily from the tree. If you tug on one and it offers resistance instead of snapping right off, they’re not ripe. In most areas, late September to mid-October is the best time to harvest Japanese Maple seeds.
It’s often best to gather the samaras in a paper bag, which helps keep them dry so they don’t get moldy while you store them. This is less important if you’re going to prepare them for germination as soon as possible. In that case, a plastic bag or bucket is fine.
To collect the seed pods, just pinch them in your fingers and pluck them off the tree. Many samaras may already have fallen by the time you’re ready to harvest them. You can simply scoop them off the ground and add them to your stash.
If you’re collecting from several different trees, you may want to label the bags. It can be interesting to see what kinds of seedlings sprout from each type of tree. They’ll usually be somewhat similar to their parents in color, shape, hardiness, and growth rate, but not always. Taking note of the variation that results can be an interesting bit of amateur botany.
Step 2: Remove the Coating
Japanese Maple seeds are covered with a coating that must break down before a seedling can sprout. In the wild, they may take two years or more to germinate. This may help to ensure that seedlings don’t all pop up at once, reducing the odds that a single year of bad weather will wipe out an entire generation. But you can speed the process up by preparing the seeds.
First, break the “wings” off each samara. The two round bumps in the middle are the only parts you need. Getting rid of the wings gives your seeds a bit more breathing room in the soil. You don’t need to peel all of the papery casing off of the seeds, but go ahead and split them apart.
Now dump the seeds into a bucket of warm (but not scalding) water. Let them sit there for about 24 hours, during which time most will sink to the bottom. If any are still floating, they’re likely not viable — you can still try to germinate them if you like, but the odds of success are lower. The soaking process should strip away the coating so the seeds will sprout more quickly.
Step 3: Cold Stratification
You can’t grow Japanese Maples from seed without cold. Winter is built into the genes of these trees, and the seeds need to go through a period of low temperatures. This is known as cold stratification. There are two ways to do this: outdoors and indoors.
Outdoors
If you live in an area with reasonably cold winters, you can simply leave the seeds outside until spring. The cold weather will handle the cold stratification for you.
Fill a shallow tray with around three to four inches of a fluffy potting mix that you’ve moistened just a bit. You can use a commercial seed starting mix or make your own from equal parts peat moss, perlite, and coarse sand. The tray itself can be pretty much any material, but wood is often best since it breathes a little more and is less likely to trap water in the soil. Drainage holes in the bottom are important no matter what kind of tray you use.
Sprinkle the seeds onto the tray. You don’t need to worry too much about spacing them out. Cover them with another ½-inch or so of your growing medium. Then cover it with a layer of fine wire mesh to keep out rodents that might devour the seeds. Find a relatively shady outdoor spot that won’t receive a lot of radiant heat from your house, and leave your seeds there until spring.
Some growers like to toss their Japanese Maples seeds in a small amount of powdered fungicide before sowing them into the tray. This may not be necessary, but it can reduce the risk of mold infestation.
Indoors
If you’re in a warmer region that falls in USDA Hardiness Zone 7 or 8, you may not be able to count on enough winter cold to jump-start your seeds. You can cold-stratify them in the refrigerator instead. This is also a way to avoid the risk of hungry mice and squirrels devouring your precious seeds.
Your timing will need to be a bit more precise with this method. Instead of soaking your seeds right away, store them in a paper bag in a cool, dark spot. Figure out when the last spring frost is forecasted for your area. About 90 days before that date, you can soak your seeds as described above, then put them in the fridge.
Fill a large, resealable plastic bag with the same kind of potting mix described above. Mix in the seeds and get most of the air out of the bag, then poke a few holes in the top for ventilation. Place the bag in your refrigerator. Try to find a spot where it won’t get knocked over and spill soil everywhere!
Let 100 days go by while the seeds sit between 38 and 55 degrees Fahrenheit. You can check on them every so often to make sure mold isn’t building up. Once you’re safely past the last frost, your seeds should be ready to go. You can take the bag out of the fridge and set it in a shady, room-temperature spot.
Step 4: Transplant
As spring settles in, you should see some sprouts popping up amid the soil. If you stored your seeds in the fridge, it may take two or three weeks in the warmth before they start to emerge. As soon as your bagged seeds begin sprouting, you can start plucking them out and transferring them to a tray of potting mix. (If you cold-stratified them outdoors, they’re already in a tray, so don’t worry about this part.)
The initial pairs of leaves will be round-edged cotyledons, embryonic leaves that look nothing like a Japanese Maple. As the roots develop further, your seedlings will start to put out their first true leaves. They’ll be tiny, but they should have the characteristic hand shape that makes these trees so recognizable.
At that point, you can move them into individual containers. They don’t need anything fancy — cheap, two to four inch plastic pots are fine. Fill each one about ¾ full of moist potting mix. A good blend for container-grown Japanese Maples should be airy and fast-draining. Try blending 60% composted conifer bark, 20% crushed pumice, and 20% peat moss. You can add a little bit of vermicompost for nutrition.
Work your fingers into the soil around each seedling and pinch them together an inch or two below the surface. This should ensure you’re gently cupping the roots instead of breaking them. Gently lift the plant from the soil and settle it into its new pot. Bury the exposed roots with a bit more potting mix, gently tamping the soil down without compacting it. Repeat this process until all of your Japanese Maple seedlings are in their own containers.
Tending to Japanese Maples Grown From Seed
Once your new trees are potted, they can begin their long journey to adulthood. They’ll need some TLC to get them through their youngest and most vulnerable years.
Hardening Off
If your seedlings sprouted indoors, you’ll need to move them outside in stages. This helps them toughen up so that they can survive being exposed to the elements. Start by taking them outside for an hour, then give them two hours the next day, and so on. Once you’re up to a full eight hours outside, you can leave them there around the clock.
Sunlight
Young Japanese Maples normally grow in the cool forest understory, so don’t leave yours in full sun, or they’ll burn. Instead, shelter them beneath a grove of taller trees, in the shadow of a building, or underneath some shade cloth. It’s especially important to shield them on the south and west sides, which is where the sun comes from during the hottest parts of the day.
Water
It’s best to keep your Japanese Maples where the rain can water them. Even if you do that, you’ll still probably need to water them sometimes. During the spring and summer, poke your finger into their soil every day. When the top one to two inches feel dry, water them well, soaking the entire soil mass until you see a trickle coming out of the bottom of the pot.
Nutrition
You shouldn’t need to fertilize your Japanese Maples at all for at least the first year of their lives. After that, you can apply a small amount of slow-release fertilizer once every spring. When your trees are still small, it’s probably best to use only ½, or even ¼, of the dosage recommended on the package. If they seem to be growing too slowly, you can increase the amount of fertilizer slightly, but only if you’re sure the tree is getting enough water and indirect sun to thrive.
Growing Space
As your new Japanese Maples start to get bigger, you’ll need to decide how you want them to grow for the long haul. One option is to raise them as container plants. If you’re going that route, you should plan to pot them up to a larger pot every two or three years.
Once a tree reaches the size you’d like it to stay, you can switch to pruning back about ⅓ of the root mass every few years to keep them compact. This article has more information about growing Japanese Maples in pots.
You could also transplant your Japanese Maples into the landscape. This is best done once they’re around three or four years old. You should plant each tree inside a mound of earth rather than a hole, so that the top of the root ball is a few inches above the ground. This helps with drainage, reducing the risk of root rot. We offer some instructions in this article.
Whether you’re transplanting your Japanese Maples into the ground or into a bigger pot, the best time to do it is when the tree is dormant. That cuts down on the shock of having its roots disrupted. Autumn is often best for landscape trees, since the ground won’t yet be frozen. Wait until your seedling has dropped most of its leaves before transplanting it.
Is It Easy to Grow Japanese Maples From Seed?
The process we’ve described above may sound complicated. However, most of the individual steps are pretty straightforward once you know what to do. Japanese Maples want to grow, and you’re just helping them do what comes naturally.
Still, you should expect to lose at least a few trees with every step of the process. Not all of the seeds will sprout, not all of the seedlings will survive their first growing season, and not all of the bigger trees will survive being transplanted. That’s why it’s usually best to start with a large number of seeds so that you have some left once the weaker ones are weeded out.
These trees are most vulnerable when they’re brand new. By the time they’ve lived outside for one or two full growing seasons, they should have well-developed root systems and be in good shape to thrive for years to come. We hope our advice helps you grow Japanese Maples from seed like a seasoned landscape artist!