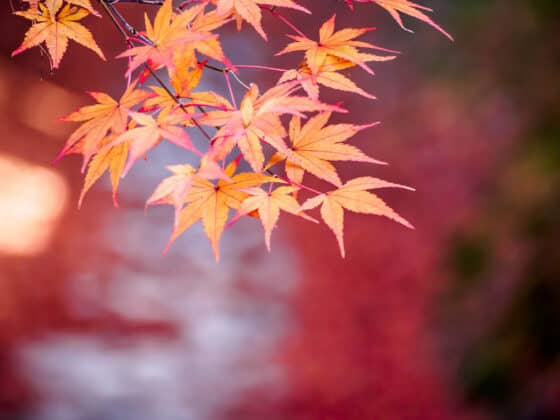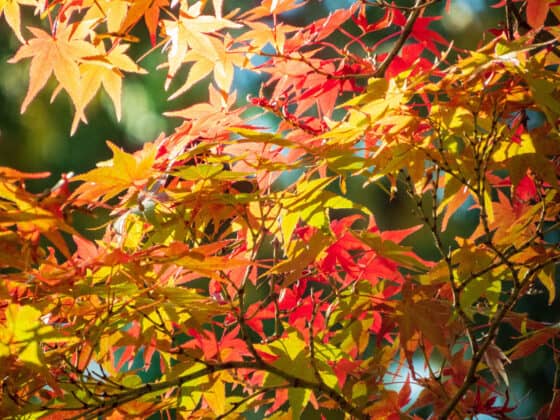

Once you see how elegant and colorful a Japanese Maple tree can become, it’s hard to stop with just one. You don’t necessarily have to go back to the nursery to get a second tree, either. It’s possible to produce a new Japanese Maple from just a clipped-off branch of the original. It takes quite a while to get a full-grown tree, but it’s a rewarding project for a patient gardener. This article will tell you everything you need to know to propagate Japanese Maple cuttings.
The best time to propagate Japanese Maple cuttings is the late spring or early summer. Clip off six inch lengths of new growth with lots of leaf nodes, planting them in a coarse, moist potting mix. Keep your cuttings warm and humid, giving them at least a year to develop roots before transplanting them.
There are a number of things you can do to increase the odds that your cuttings will root and grow successfully. We’ll include those tips and tricks below in our step-by-step guide to propagating Japanese Maples from cuttings. Though the process isn’t exactly easy, it’s very achievable with some patience and care. And it’s extremely gratifying to watch a brand-new Japanese Maple grow from a single slender branch.
Why Propagate Your Japanese Maple From Cuttings?
Growing a Japanese Maple tree from a chopped-off branch can seem a little like science fiction. Why would you raise a tree this way when nature offers a ready-made method of growing them from seeds?
The main reason is that a tree grown from seed is often strikingly different from its parent. The same process happens in humans all the time: a tall human with curly brown hair can easily give birth to a short, blond, straight-haired child. Well, your Japanese Maple with pink-and-white reticulated foliage can also make seeds that grow into trees with plain green leaves. The random recombination of genes that happens with sexual reproduction offers no guarantees that you’ll get the same type of tree you started with.
Things are different when you propagate Japanese Maple cuttings. This process is a form of cloning rather than traditional reproduction, ensuring that you’ll get a tree that’s genetically identical to the parent plant. This reliability is why many people opt for cuttings over seeds.
What About Grafting?
Commercial tree nurseries usually opt for an even stranger method: they splice a cutting from one type of tree onto the chopped-off stump of another. Why create this bizarre fusion? Because it lets you combine one type of Japanese Maple known for beautiful foliage with another type that grows strong and vigorous roots. When done right, it’s a best-of-both-worlds approach.
However, grafting is significantly more complicated than growing a Japanese Maple from cuttings. To make it worth your while, you need to start with a seedling from a sturdy-rooted Acer palmatum variety to use as rootstock. You’ll usually want to grow it for a few years before it’s ready to receive the graft. And there’s no guarantee of success once you get to that point — temperature, humidity, and the inborn hardiness of the plants you’re using can all affect the odds of a graft taking hold.
What You Need To Grow Cuttings From a Japanese Maple
Once you actually snip off the branches that you’re going to propagate, it’s best to act fast. The longer you wait, the greater the risk that your cuttings will dry out or die off. So make sure you have all your necessary materials at the ready! Here’s what you should have on hand:
Potting Mix For Japanese Maple Cuttings
The right rooting medium can make or break an attempt at propagation. You should prepare something with good drainage, meaning water can flow through rapidly instead of pooling in the soil. At the same time, it should have some moisture-retention ability to keep the roots from drying out.
A simple but effective blend is a 50/50 combo of peat moss and coarse perlite. Some growers have reported success with pure perlite or a mix of half perlite and half potting soil — feel free to mess around with a few different options and see what works for you!
Just don’t try rooting your Japanese Maple cuttings in ordinary garden soil. It’s far too water-retentive to work well in a small container. Stick with a mix made of sterile ingredients instead.
Pruning Shears
We’re big fans of these bypass pruners, but any decent set of garden clippers should work. The most important thing is that they’re sharp! You want to be able to snip right through the branch in a single clean motion. Otherwise, you could leave a ragged cut on your tree that might get infected.
Disinfectant
Speaking of infections, make sure that you have something you can use to clean off your blades before each cut. This reduces the likelihood of introducing fungal or bacterial pathogens into the wounds on your tree or your cutting. Your little Japanese Maple clones will be quite vulnerable when they’re first getting started.
Rubbing alcohol makes a good sanitizing agent, and it’s inexpensive and simple to find. Prepackaged alcohol wipes make it fast and easy to swab down your pruners. You can also use a clean rag soaked in a 1-in-10 dilution of household bleach.
Rooting Hormone
Many plants take root from cuttings with minimal prompting, but not Japanese Maples. You’ll need to dab the cutting with a synthetic hormone that will trigger the cells to start growing roots. These products are available in a variety of forms, including gels and liquids, but we like this rooting hormone powder.
Note: The product above is sold at varying strengths — you’ll want to select #8. That’s what Hormex recommends for moderately difficult-to-root plants like Japanese Maple.
Gloves
Some rooting hormone products can cause irritation if they contact your skin for too long. It’s probably a good idea to wear garden gloves when handling them, just to be safe.
Eye Protection
You probably don’t want hormone powder in your eyes, either. And a little bit of protective eyewear is never a bad idea when you’re snipping whippy branches off of your Japanese Maple.
Containers
You’ll need someplace for your baby Japanese Maples to take root and grow. For the initial rooting stage, it’s good to maximize humidity, so a clear plastic tub with a locking lid is a good option. Make sure it’s deep enough that your cuttings can stand up straight inside. If you want something cheaper, a shallow plastic tray should be fine. You can always cover the cuttings with clear plastic bags to lock in moisture.
Though you want to trap most of the humidity inside, you don’t want the bin to be completely unable to shed moisture. Drill some holes in the base to create drainage.
Your Japanese Maple cuttings will also need somewhere to live once their roots are developed enough to move out of the bin. Ordinary four inch diameter plastic plant pots should do the trick, as long as they have drainage holes.
A Jar Or A Damp Cloth
To successfully propagate Japanese Maple cuttings, you need to keep the sliced ends moist until you’re ready to plant them. It’s a good idea to have something to dunk or wrap the cut ends in right after snipping them off. Wrapping them in a wet, clean cloth works, as does placing them in a vase or jar of water.
How to Propagate Japanese Maple Cuttings, Step By Step
Once your tool kit is ready, you can get started clipping and propagating your Japanese Maple clones. Here’s how:
Step 1: Wait For The Right Moment
We know — we said you could get started, and now we’re telling you to wait? The timing really does matter, though. It’s far easier to propagate a softwood cutting of a Japanese Maple, meaning new growth that’s just formed this season. The ideal time is at the end of spring or the beginning of summer, when the new shoots are just beginning to harden off. They should be fairly flexible but stiff enough to snap.
Step 2: Choose Your Japanese Maple Cuttings
Next, you’ll need to identify which branch ends you want to cut. You’re looking for new growth that’s just emerged this season. Choose sections roughly six inches long and about as thick as a mechanical pencil. Ideally, they should have quite a few leaves or leaf nodes (the swollen parts of the branch where leaves emerge).
It’s best if you can cut sections that are interfering with the shape of the tree, since you’d want to prune them anyway. Shoots emerging at the junction between two other branches are a common choice; removing them helps open up the canopy. For more on pruning Japanese Maples for shape, see this article.
Step 3: Make Clean Cuts
The best way to cut a branch from your Japanese Maple is in a single firm snip, so don’t rush. Make sure your pruners are positioned just right before closing the handles. Make the cut at a 45-degree angle. This maximizes the exposed surface area on the cutting, helping it absorb more water.
We recommend taking at least 10-15 shoots if possible. A 100% success rate is pretty much unheard of, even among professional growers who propagate Japanese Maple cuttings all the time. So make sure you have a few spares in case some of them die along the way.
Step 4: Put Your Japanese Maple Cuttings In Water
As you remove each twig, place the cut end into your water jar (or wrap it in your damp cloth). This should help prevent your cuttings from drying out while you work. It’s still best not to dawdle, though!
Step 5: Trim Your Cuttings
Clip or pluck off all of the leaves from at least the lower third of the stem. (The “bottom” here means the end that was previously attached to the tree.) The nodes where those leaves were growing will be the sites of new root growth. Don’t worry about making these cuts at an angle, just get as close to the branch as possible.
Though only the bottom third has to be completely bare, it’s usually a good idea to remove most of the foliage up top as well. You don’t need a lot of leaves to propagate Japanese Maple cuttings. Foliage requires energy to maintain, and you want your clones to put most of their resources toward growing roots. Two to five leaves remaining on the cutting should be plenty. Always clip off the uppermost end of the twig; this helps redirect growth out to the sides.
Step 6: Apply Rooting Hormone
Fill a small cup with your rooting hormone powder, then dunk the base of each cutting in it. Gently tap off any excess. The powder should cling nicely to the stem, especially the moist cuts where you severed the cutting and removed leaves.
Step 7: Plant Your Japanese Maple Cuttings
Moisten your growing medium slightly as you add it to your propagation bin. The “soil” should feel roughly as damp as a squeezed-out sponge. Lay down a layer that’s deep enough to anchor your cuttings and offer some space for their roots to extend downward, but not so deep that they’ll be pressed up against the lid.
Stick each cutting into the rooting mix, making sure that at least a few of the bare nodes are underground. It may be helpful to make small holes with a chopstick first. That way, the hormone powder is less likely to get scraped off as you insert your cuttings.
Nestle your Japanese Maple cuttings into the soil to make sure they won’t tip over. At this stage, the clones can be fairly close to each other — you’ll be transplanting them before their roots get very large.
Step 8: Tend To Your Clones
Put the lid (or bags, or plastic wraps) over your Japanese Maple cuttings and place your bin outside. Don’t put them in a spot where the sun’s rays can hit them directly. They’re very susceptible to scorching in their enclosed box. However, indirect sunlight is great for Japanese Maples, so try to find a location with lots of ambient light.
Keep them in the propagation bin for the next three months or so. The goal during this time is to keep them warm but not hot and moist but not drenched. In fact, it’s best if you can keep the soil moist solely by occasionally misting it. Do this when the top inch or two feels dry.
If the bin is constantly dripping with condensation, crack the lid and let it air out a bit. It should ideally be a bit foggy during the morning and at night, but not in broad daylight.
Potting Up Your Japanese Maple Cuttings
Your baby Japanese Maples are ready to move into larger pots once their roots are a few inches long. You can check on them about five weeks after planting to see how they’re doing. Give them a little tug — resistance means they’re taking root. New shoots and leaves sprouting are also a good sign.
After about three months, your Japanese Maple cuttings should be ready for repotting. Prepare some loose potting mix with lots of organic matter and coarse inorganic materials for drainage. Here’s an example of a blend that should work well:
You can also include a small amount of slow-release pellet fertilizer to provide nutrition. Mix your materials thoroughly and moisten them just like you did with the rooting mix. Then use it to fill ⅓ to ½ of a four inch plant pot.
Gently work your fingers into the soil under your Japanese Maple cutting. Lift it out of the bing and transfer it to the pot. Fill around the roots with more potting mix, being careful not to tear them until they’re buried, and your miniature tree is stable.
Raising Japanese Maple Cuttings
Even if your ultimate goal is to propagate Japanese Maple cuttings into outdoor, soil-rooted trees, you should keep them in pots for at least another year. The soil environment is much more unpredictable than a container. You want your Japanese Maples to be strong and healthy before they venture out into the wild.
During this time, they need dappled, mostly indirect sunlight. Their preferred environment is an eastern exposure or near a bigger plant that will shade them from midday onward. Check the potting mix every 2-3 days, watering thoroughly whenever the top one to two inches feel dry.
If you live in an area with cold winters, you’ll want to insulate the roots against freezing temperatures. As the fall draws to a close, the following techniques can all help:
- Burying your pots in the ground
- Heaping mulch around them
- Wrapping them in bubble wrap
- Elevating them off the ground on a garden potting bench table
- Moving them to an unheated indoor space like a barn or garage
Note that you should not take your Japanese Maple cuttings inside to a room-temperature space. Periods of cold and dormancy are important for their healthy growth! And if you move them indoors at all, you’ll need to water them every so often to replace what they’d absorb from winter rain and snow. After they’ve been in their pots for a year, you can start thinking about planting your Japanese Maple cuttings.
Be prepared for some of your plants to die between now and then. In fact, whenever you propagate Japanese Maple cuttings, you should assume at least a few of them will die at every stage of the process. That’s why it’s important to start with a decent number of cuttings. The good news is that a clone that makes it through the process should be strong and vigorous, well-prepared to grow into a healthy Japanese Maple tree.
Air Layering Japanese Maple Cuttings
Air layering is an alternate way to propagate Japanese Maple cuttings. It’s a little more time-consuming, but it lets you work with bigger, hardier branches. The idea is to trick a branch into growing roots before you cut it off the tree. This gives your Japanese Maple cutting a head start.
When choosing a section to air layer, remember that the tree will follow the structure of the branch. So pick a limb that looks like a miniature version of a tree you’d like in your garden! Here’s how to air layer a Japanese Maple:
Step 1: Cut And Peel The Bark
Use a sharp, disinfected knife to make a shallow cut through the bark near the base of the limb. The cut should go all the way around the branch in a complete ring. Make another one an inch or two further down. Then shave off the bark and the thin yellow-green layer of tissue in between the cuts.
Step 2: Apply Rooting Hormone
Gently brush rooting hormone powder over the nodes just above the exposed white wood. This may be easier if you mix it with a tiny bit of water to make a paste. Toothbrushes or paintbrushes make good tools here. Again, it’s probably best to use gloves.
Step 3: Seal In The Moisture
Pack a thick, damp clump of rooting medium around the wound. Sphagnum moss is the most common choice, but some people have reported success with coconut coir around the wound. To lock in the moisture, wrap an impermeable barrier around the rooting medium, such as:
- Plastic wrap
- A soda bottle with holes in the bottom and top so that it fits around the branch
- A purpose-built air layering ball
You might also want to wrap a sheet of foil around it for temperature control may also help. Use duct tape or garden twine to hold everything in place.
Step 4: Let Your Japanese Maple Branch Grow Roots
Wait a few months, unwrapping the ball periodically to mist it. You want the rooting medium to remain consistently moist. Let it keep going until the roots are a few inches long, then cut the branch off with a pair of disinfected loppers. From there, you can treat it like an extra-large, pre-rooted Japanese Maple cutting.
Final Thoughts
You should now be ready to propagate Japanese Maple cuttings like a pro! It’s not the world’s easiest gardening project, but the techniques above should give you a strong shot at success. And even if you only end up with one or two healthy Japanese Maple trees, that could be the start of decades of beautiful growth in your garden.